LCD hello world
The Arduino Nano drives a 16×2 HD44780 character LCD over the real 4-bit protocol: nibbles, E strobes, init dance and all.
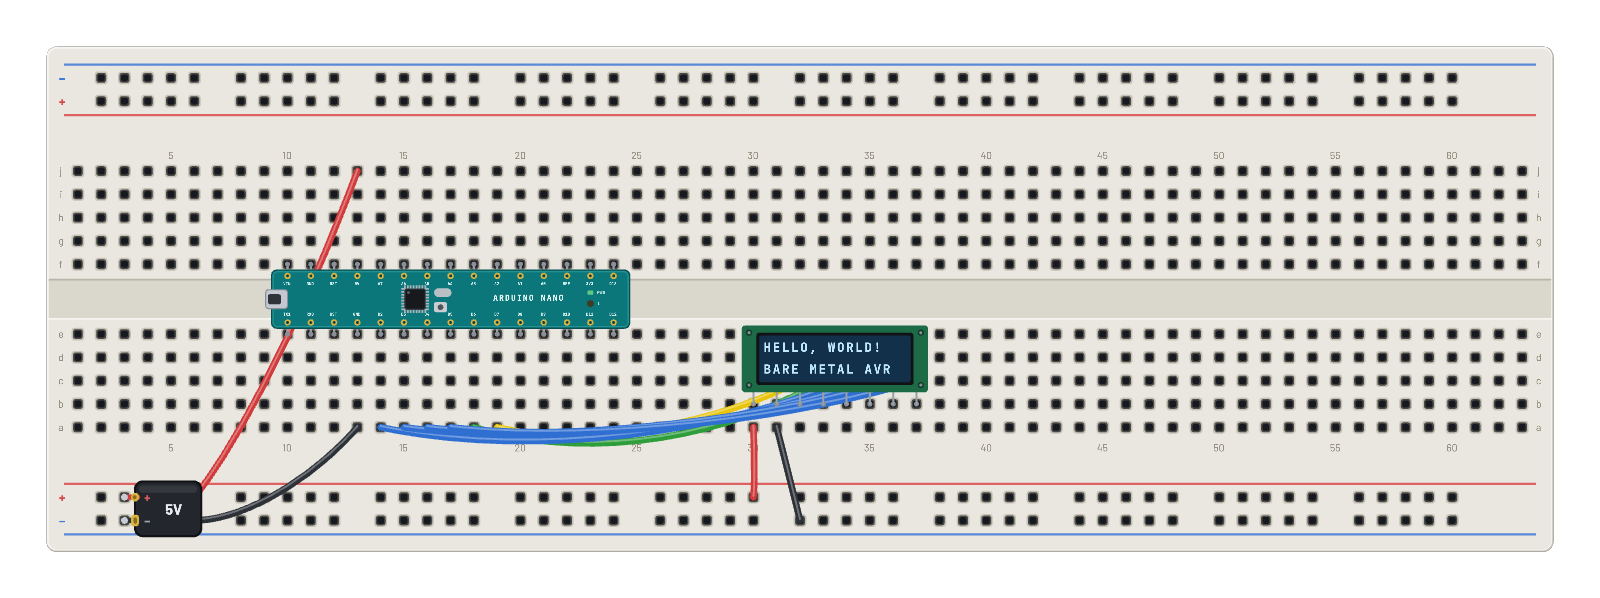
How it works
The 16×2 character LCD spoken to in its native tongue: bare-metal AVR firmware runs the HD44780's 4-bit protocol directly. Six wires carry it all: D2–D5 feed the LCD's D4–D7 data nibbles, D6 strobes E, and D7 selects register with RS. The firmware performs the famous init dance (function set, display on, clear), then writes two lines character by character, each byte split into two nibbles with an E pulse apiece. The panel decodes it exactly like the real controller, character generator and all.
What's on the bench
- Arduino Nano
- Battery
- LCD 16×2
How it's wired
- hole a13→hole B-5
- hole j13→hole B+5
- hole a30→hole B+25
- hole a31→hole B-26
- hole a19→hole c32
- hole a18→hole c33
- hole a14→hole c34
- hole a15→hole c35
- hole a16→hole c36
- hole a17→hole c37
This project runs prebuilt firmware on the emulated board; open it in the simulator to watch it work and inspect every part live.
Try this
- Press ⟲ Restart and watch the two lines reappear as the init dance replays.
- Probe the E pin with the ∿ Scope to catch the strobe pulses that clock each nibble.
- Select the LCD and check the component reference: the pin table is the wiring diagram.
- Trace the six data wires: four data bits + E + RS is the whole 4-bit bus.