Encoder menu (big OLED)
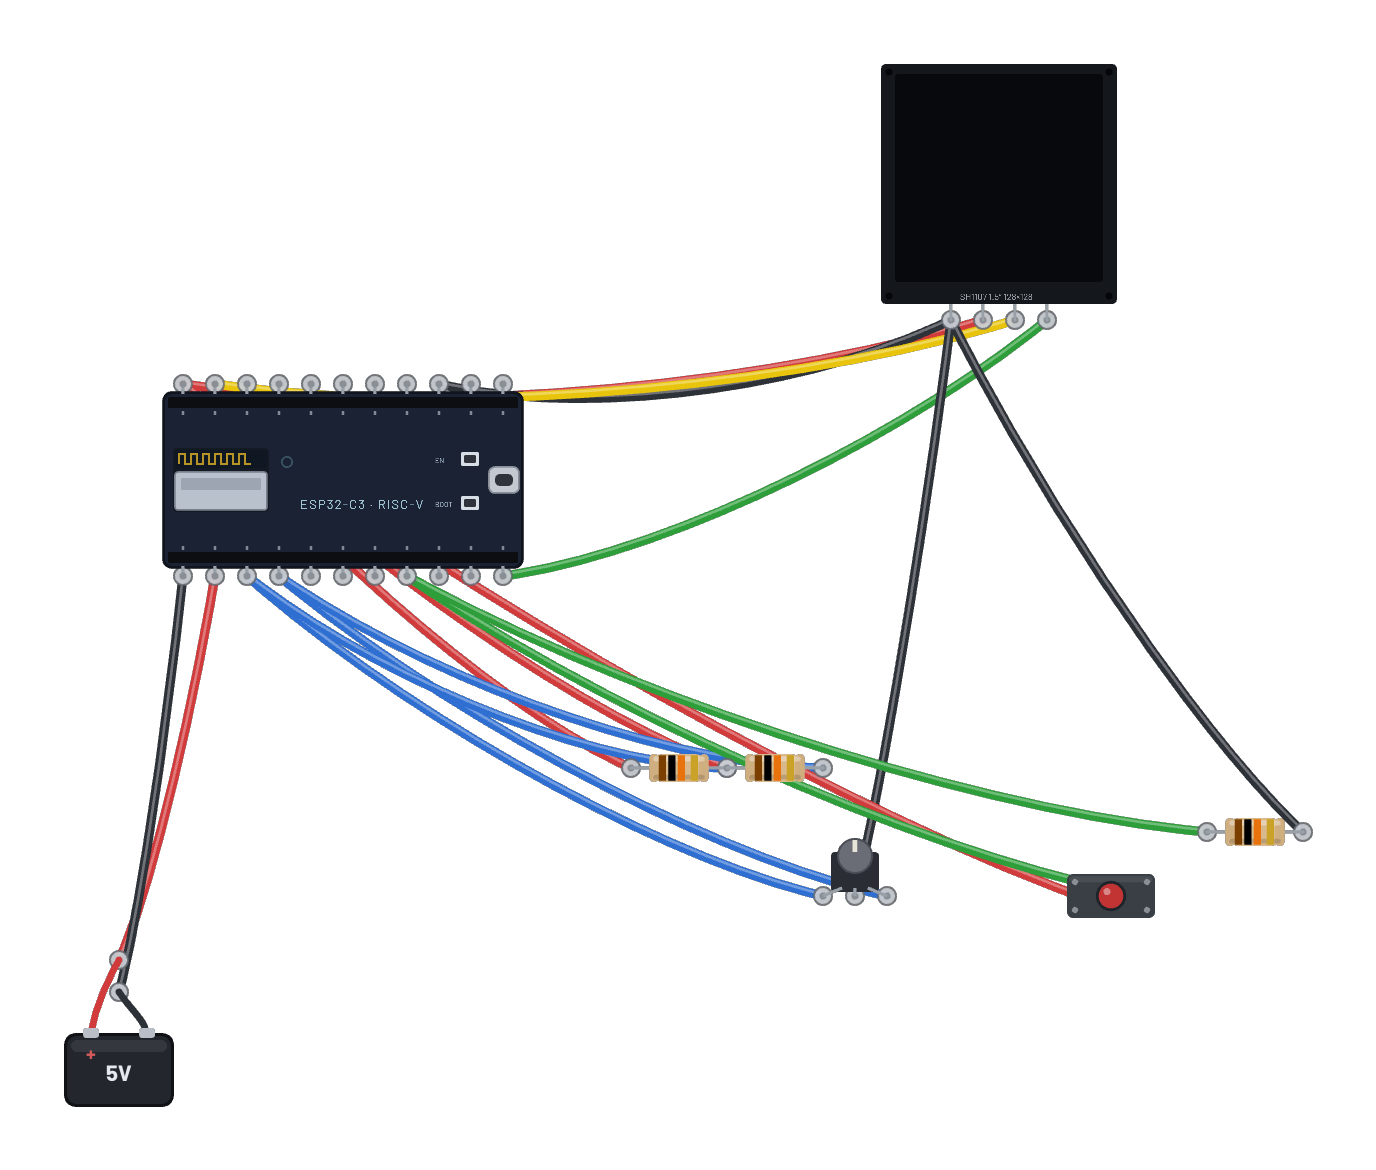
A settings page on the 1.5″ 128×128 SH1107, driven by a rotary encoder decoded in MicroPython (gray code on two GPIOs with external pull-ups). Select the encoder and use its Inspector arrows to scroll; click the button to toggle an entry.
How it works
A settings page like a 3D-printer's, on the big 1.5″ SH1107. The rotary encoder's A and B contacts close to ground in quadrature; external 10 kΩ pull-ups define the idle level, and the script decodes the gray code with a lookup table: one step direction moves the selection down, the other up. Six menu items render to the 128×128 framebuffer, and the pushbutton (pulled down, wired to 3V3) toggles the selected entry on a rising edge. Every action prints to serial: SEL n as you scroll, TOGGLE n as you click.
What's on the bench
- 3× Resistor
- Battery
- Button
- Encoder
- ESP32-C3
- OLED 1.5″ 128×128
How it's wired
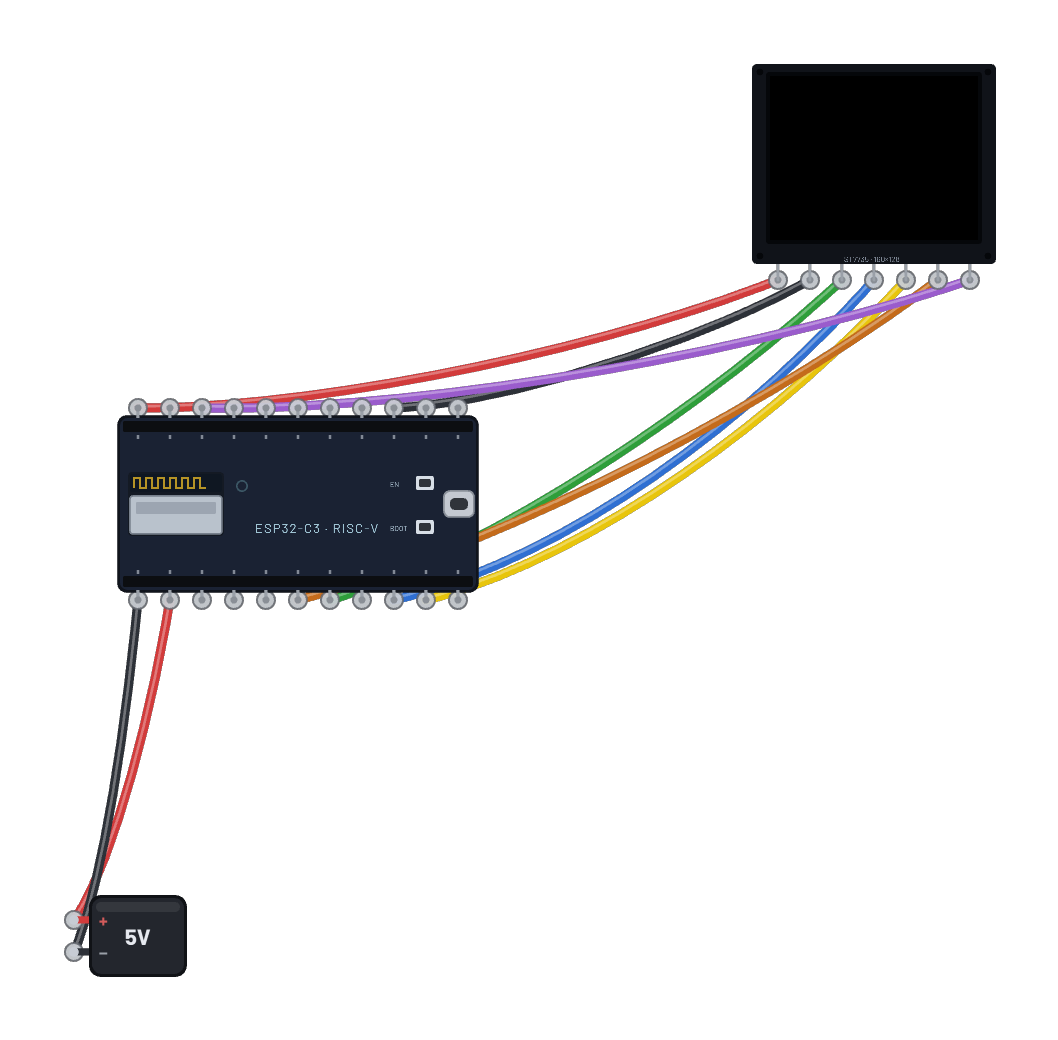
- Battery · pos→ESP32-C3 · vin
- Battery · neg→ESP32-C3 · gnd
- ESP32-C3 · 3v3→OLED 1.5″ 128×128 · vcc
- ESP32-C3 · gnd2→OLED 1.5″ 128×128 · gnd
- ESP32-C3 · g9→OLED 1.5″ 128×128 · scl
- ESP32-C3 · g8→OLED 1.5″ 128×128 · sda
- Encoder · com→OLED 1.5″ 128×128 · gnd
- Encoder · a→ESP32-C3 · g0
- Encoder · b→ESP32-C3 · g1
- Resistor · a→ESP32-C3 · 3v3
- Resistor · b→ESP32-C3 · g0
- Resistor · a→ESP32-C3 · 3v3
- Resistor · b→ESP32-C3 · g1
- Button · a→ESP32-C3 · 3v3
- Button · b→ESP32-C3 · g5
- Resistor · a→ESP32-C3 · g5
…and 1 more connections — open it in the simulator to see every wire.
The code
This MicroPython script runs on the emulated board every boot; edit it in the Code tab.
from machine import I2C, Pin
import framebuf, time
i = I2C(0, scl=Pin(9), sda=Pin(8))
buf = bytearray(2048)
fb = framebuf.FrameBuffer(buf, 128, 128, framebuf.MONO_VLSB)
for c in b'\xae\x20\xa8\x7f\xd3\x00\xdc\x00\x81\x4f\xad\x8a\xa4\xa6\xaf':
    i.writeto(0x3d, bytes([0, c]))
def show():
    for p in range(16):
        i.writeto(0x3d, bytes([0x00, 0xb0 + p, 0x00, 0x10]))
        i.writeto(0x3d, b'\x40' + buf[p*128:(p+1)*128])

a = Pin(0, Pin.IN)
b = Pin(1, Pin.IN)
btn = Pin(5, Pin.IN)
items = ['LED strip', 'Fan boost', 'Buzzer', 'Wi-Fi', 'Debug log', 'About']
on = [False] * len(items)
sel = 0
CODE = {(0, 0): 0, (1, 0): 1, (1, 1): 2, (0, 1): 3}
last = CODE[(a.value(), b.value())]
lastbtn = btn.value()
def draw():
    fb.fill(0)
    fb.text('Settings', 0, 0)
    fb.hline(0, 10, 128, 1)
    for i, name in enumerate(items):
        y = 18 + i * 14
        fb.text('>' if i == sel else ' ', 0, y)
        fb.text('[x]' if on[i] else '[ ]', 10, y)
        fb.text(name[:11], 38, y)
    show()
draw()
print('MENU')
while True:
    c = CODE[(a.value(), b.value())]
    if c != last:
        d = (c - last) % 4
        if d == 1:
            sel = (sel + 1) % len(items)
            print('SEL', sel)
        elif d == 3:
            sel = (sel - 1) % len(items)
            print('SEL', sel)
        last = c
        draw()
    v = btn.value()
    if v and not lastbtn:
        on[sel] = not on[sel]
        print('TOGGLE', sel, on[sel])
        draw()
    lastbtn = v
    time.sleep_ms(20)
Try this
- Select the encoder and click its Inspector arrows to scroll the highlight through the menu.
- Click and release the pushbutton to flip the selected item between ON and OFF.
- Add a seventh entry to the items list in the Code tab and re-run — the menu just grows.
- Watch the serial tab narrate every detent and toggle.